Summary
Before you start to use your GPSr for the first time, I suggest you setup
you GPS as below but entering your local equivalent settings.
GPS
Configuration
You will need to read your manual to find where these settings
are for your model of GPS. If your GPS is a Garmin then the
terminology will be similar. The illustrations below are for a
Garmin GPSmap 60CSx.

1) System Setup:
look for a parameters that says WAAS/EGNOS which is often disabled
by default. I prefer to have it enabled.
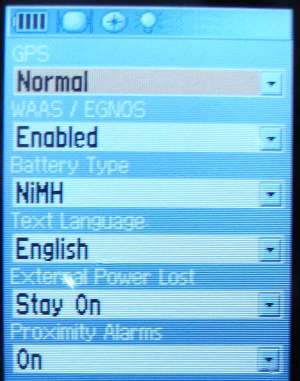
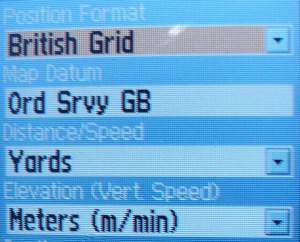
2) Units
a) Position
Format: Set to the British Grid using the Datum Ord Srvy GB (this is
often set by default when selecting the British Grid).
b) Distance: in Yards not Metres - explained later!
c) Elevation: Metres
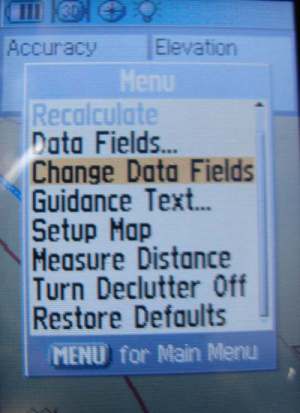
3) Map Accuracy
and Elevation
If you look at the
Map page display (first illustration above) there are 2 data fields
Accuracy and Elevation. Depending on your GPS you should be able to
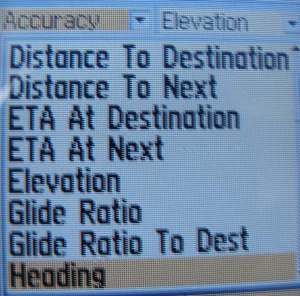
select and configure these. On the GPSmap 60CSx you can have up to 4
fields which are selectable from a list. Configure your GPS as
above. On the GPSmap 60CSx the setup screens look like this:
have
another look at the top illustration, there are 2 zoom controls for
the map: the IN and OUT buttons. When surveying zoom in to the
maximum setting. 30ft is shown at bottom left of the screen but it
does go down to 20ft.
4) Data Reset:
Get to know how to clear all the data
from your GPS, so for each survey day you start afresh at Waypoint
number 1.
Look for a screen equivalent to this:

5) If
your GPS has an air pressure sensor.
Calibrate the Altimeter by
either entering a know elevation taken from an OS map, or by
entering the actual air pressure. The elevations given appear to be
reasonably accurate. Likewise the auto-calilbration of altitude also
appears to be reliably, but it is well worth cross-referencing this
with a know elevation.

6) Check that WAAS
correction is enabled if your GPSr has this facility.
7) Now get to know how to
'mark' or 'save' a waypoint, in this model it is as easy as pressing
the MARK button followed by the ENTER button, then walking to the
next position you want to record and repeating the process.
Surveying:
When you have set
your GPS up as per paragraphs 1), 2) and 3) above then you do not
need to alter those settings again.
Before each
survey do: 4) Data Reset and
5) calibrate Altimeter (only if elevation readings are required)
Note: you should
always download your survey data to your PC after each survey day,
then you no longer need
the data in your GPS allowing you to do a Data Reset ready for your
next survey even if it is back to the same site. This is explained
later in
SWAAG Mapping Procedure Stage
2 - GPS Data Processing using GPS-TrackMaker
Switch to the map
page and zoom in to the maximum 20ft as below:
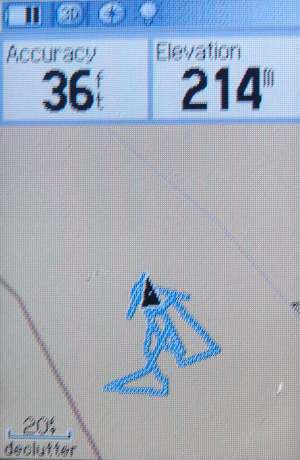
Until
your GPS has stabilised and all the satellites have been 'engaged',
the Accuracy reading will be high, typically in the hundreds, then
quickly coming down to double figures. The image above was taken
indoors hence the high reading at 36ft.
Waypoint measurements taken when GPS accuracy readings are in single
figures up to about 15ft are usually good with few rogue
measurements, as long as you follow the guidelines below. Once you
get above this i.e. between 16-25ft then they will degrade. How much
depends on your GPS. One part of the learning curve is establishing
this for your instrument. Readings above 20 ft then consider using
an external aerial.
Taking Waypoint Measurements Summary:
- Always use freshly charged or new
batteries
- Turn your GPSr on 5 or 10 minutes before
using it.
- Set the GPSr
to indicate feet rather than metres, so that the current
waypoint accuracy in feet is displayed. This gives you a more
sensitive indication on how the GPSr is performing whilst taking
measurements.
- Display the GPSr map page zoomed in to the
maximum setting (usually 20 feet ), and configure the Data
Fields on the map page to display Accuracy (in feet) and
Altitude (in metres).
- Have an indicated accuracy figure as low
as possible and preferably below 20ft and ideally below 15 feet.
Consider using an external aerial when the GPSr indicates an
accuracy in excess of 20 feet.
- Make at least 10+ waypoints around the
boundary of small features. Always holding the GPSr upright at chest
height.
- Before taking each waypoint
measurement, watch the map
indicator arrow on the GPSr unit (at maximum zoom) until it has settled down.
Usually about 5-10 seconds.
- Inbetween waypoint
measurements keep the GPSr in the same position. If you drop
your arms down or put the GPSr in your pocket, you must let it
stabilise again at chest height before taking you next
measurement.
- Draw a plan view in the log so this can be
compared with the waypoint data plot.
- Take your time. Hurried measurements
will lead to inaccuracy.
- More measurements is always better
than fewer.
- Remember
proximity to trees, buildings, hillsides can degrade your
readings.
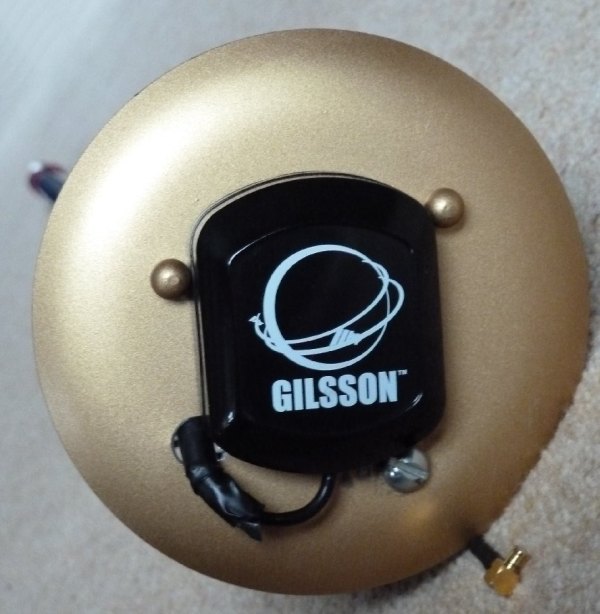
External Aerial
The Gilsson aerial shown below is
designed to be magnetically attached to car roofs. It was purchased
from Ebay for about £15. They are available with several lengths of
cable. The one illustrated is 3m long cable.
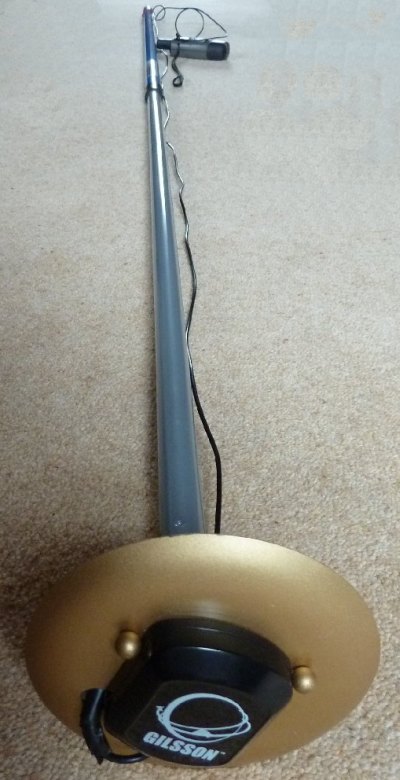
The 'Do It Yourself' assembly
included buying a metallic candle holder or something similar (make
sure it is magnetic), and an extendable telecopic pole that is
designed to extend the reach of a paint roller (from B&Q).
The spikes used to secure the candle were easily removed, and the
end of the pole was easily modified to secure the candle holder
using a small chrome slotted bolt and nut.
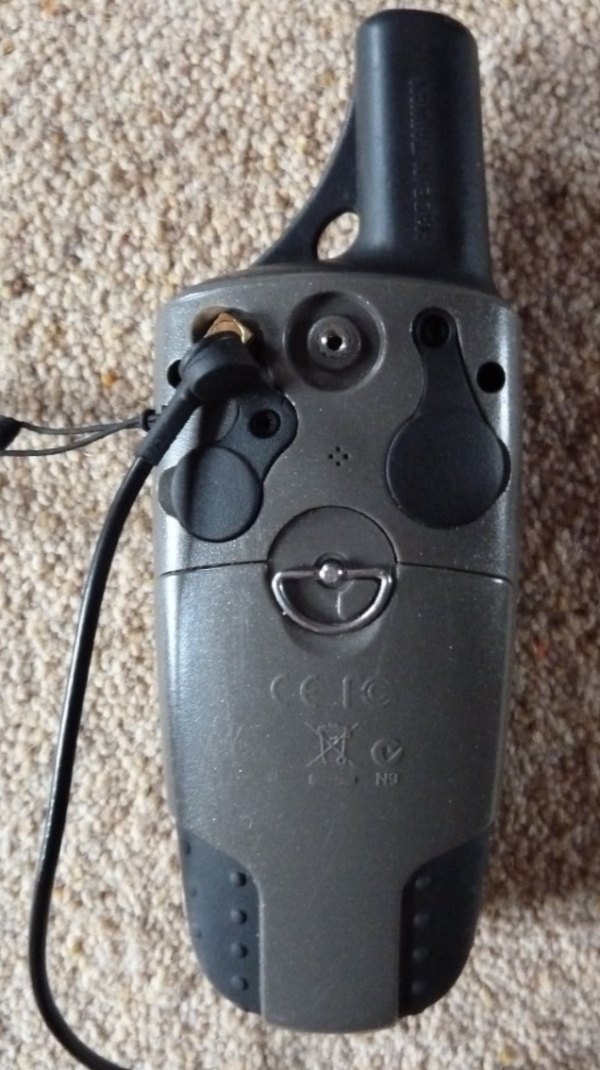
The aerial cable just pushes into the
female socket on the back of the GPS.
Viewing Waypoint Measurements:
This
is covered in:
SWAAG Mapping Procedure Stage
2 - GPS Data Processing using GPS-TrackMaker

SWAAG GPS Surveying Technology - 7 papers by Stephen Eastmead is licensed under a Creative Commons Attribution-NonCommercial-NoDerivs 3.0 Unported License.
Based on a work at www.swaag.org.
|